How to Set Up Voicemail on iPhone: A Simple Step-by-Step Guide
Introduction
Setting up voicemail on your iPhone is one of the first things you should do when activating your new device or switching carriers. Whether it’s for personal or professional use, voicemail ensures that you never miss an important message, even when you can’t answer your phone. In this guide, we’ll walk you through the easiest way to set up, record, and manage your voicemail on iPhone.
Why Setting Up Voicemail is Important
Voicemail allows callers to leave you a message when you’re unavailable. Whether you’re in a meeting, in a location with poor signal, or simply can’t answer at the moment, voicemail acts as your backup communication channel.
Benefits include:
- Never missing a message from clients, friends, or family
- Providing a professional impression with a custom greeting
- Keeping your communications organized and manageable
Accessing the Voicemail Feature on iPhone
To access voicemail:
- Open the Phone app on your iPhone.
- Tap on the Voicemail tab located at the bottom right of the screen.
- If you have multiple lines (e.g., personal and business), select the line for which you want to set up voicemail.
Step-by-Step: How to Record a Custom Voicemail Greeting
Follow these simple steps:
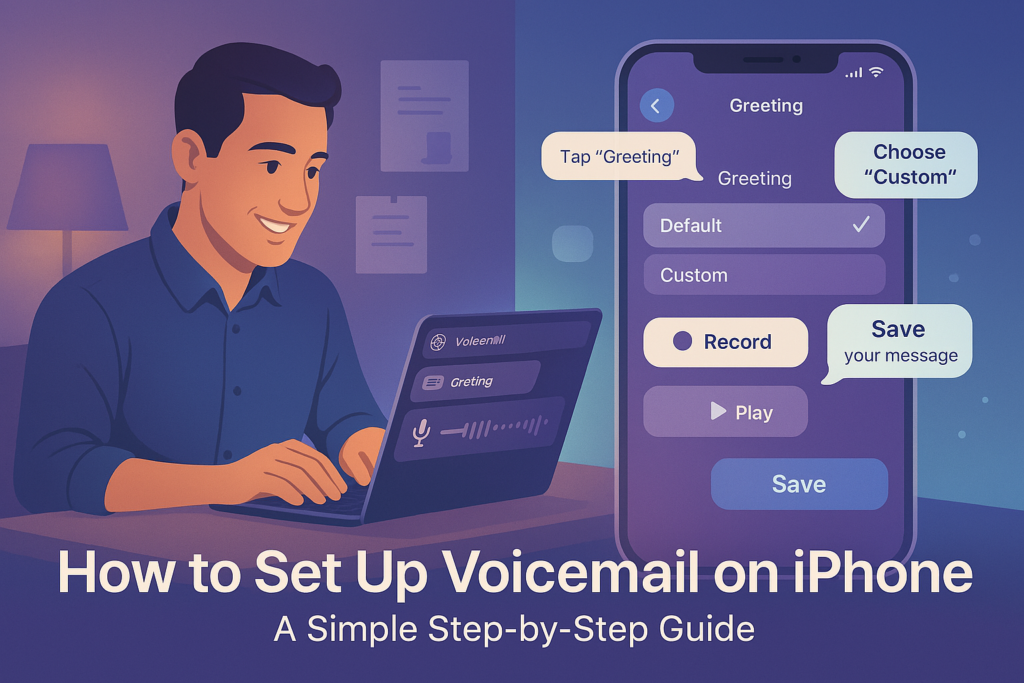
- Tap Greeting at the top left corner of the Voicemail screen.
- Choose either Default or Custom.
- Default uses the automated system voice.
- Custom allows you to record your own message.
- Tap Record to begin your message.
- Speak clearly and keep the message short and polite. For example:
“Hi, you’ve reached [Your Name or Business]. Please leave your name, number, and a message after the tone.”
- Tap Stop when finished.
- Use Play to listen back to your recording.
- Tap Save to apply the new greeting.
Now your iPhone voicemail is ready to receive messages.
Troubleshooting: What If You Don’t See the Voicemail Option?
In some cases, the voicemail tab may not appear. This is typically due to one of the following reasons:
- Carrier limitations: Not all carriers support voicemail. Contact your provider to enable it.
- SIM card not fully activated: Make sure your phone plan is active.
- Device or iOS issues: Restart your phone or update iOS if voicemail still doesn’t show.
Tips for a Professional Voicemail Message
Whether you’re using your phone for personal or business reasons, here are a few voicemail tips:
- Use a friendly but professional tone
- Keep it short (15-30 seconds)
- Mention your name or company
- Ask the caller to leave a detailed message
- Avoid background noise while recording
Final Thoughts
Setting up voicemail on iPhone is quick, easy, and incredibly useful. Whether for business or personal use, having a clear and professional voicemail message ensures better communication and leaves a positive impression. Take a few minutes to record your greeting today – it could make all the difference when you miss a call.
FAQs
Q1: Can I set different voicemails for different lines?
Yes, if your iPhone has multiple lines (eSIM or dual SIM), you can record different greetings for each.
Q2: What if I want to re-record my voicemail?
Simply go to Voicemail > Greeting > Custom and tap Record again.
Q3: Does voicemail work without a data connection?
Yes, voicemail works through your carrier’s network, not the internet.
Q4: Why is there no voicemail button on my phone app?
Your carrier may not support visual voicemail or it may be disabled. Contact your carrier to resolve.
Q5: Is voicemail available internationally?
Voicemail depends on your carrier. Most international plans offer voicemail, but features may vary.
